The sizes and design of axles can greatly vary for vehicles, ranging from compact to more elongated designs, and they are capable of operating on a myriad of surfaces. Nevertheless, most often, the axles are tasked with the responsibility of transferring power to the wheels, requiring them to operate on perfectly smooth terrains.
Some roads are far from flawless; as a result, the axle must deliver power to the wheels while also traveling with the suspension protected from dirt or debris and constant velocity by the CV Axle Boot. This article will look at CV Boots and CV Boots replacement.
Understanding CV Boots
The word “joint” comes from the CV’s flexibility to move in any direction with your vehicle’s suspension.
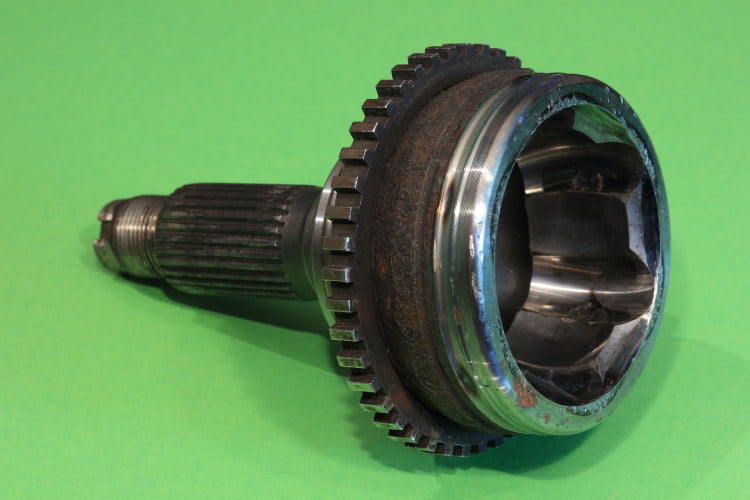
What Is A CV Joint?
CV joints are the essential parts of an automobile found in four-wheel-drive and rear-wheel-drive vehicles.
A CV joint, also known as “half-shafts”, means Constant Velocity Joint. They distribute engine forces and torque from the transaxle to the two driving wheels in front-wheel-drive cars.
Functions:
- Maintain a steady velocity for the drive wheels regardless of the road.
- Link the transmission of your car to the wheels.
- Join two rotating shafts together.
- Transfer power effectively and continuously from one side of the shaft to the other at multiple angles.
Types of CV Joint:
Out of the numerous types the CV joint has, there are two most common types: The inner CV Joint and the outer CV Joint.
- Inner CV Joint
The Inner CV joint is also known as the tripod-type CV joint — used on the inner side of the half or driveshafts in front-wheel-drive cars. They transfer the same speed and torque level to the driving shafts and axles.
- Outer CV joint
Front-wheel-drive cars use the outer CV Joint on the outside of the shafts.
What Is A CV Boot?
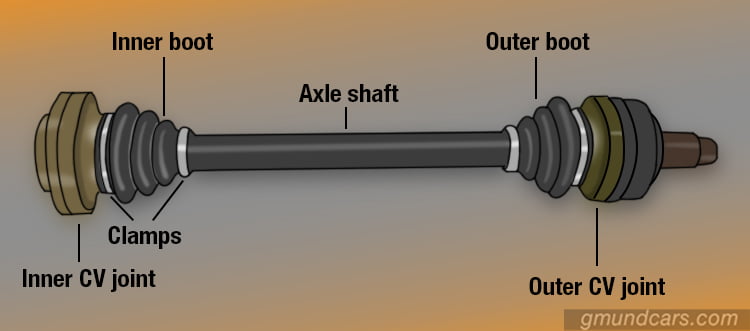
A Constant Velocity Boot is also known as a drive axle boot. It ensures the CV joints are free from dust or external debris. In addition, it keeps the lubricant that helps maintain the joint in good condition.
Functions:
- Protect the CV joint by acting as its standard dust cover.
- Allow the CV joint to have a long service life by keeping it clean.
- Keep the grease that lubricates the CV joint.
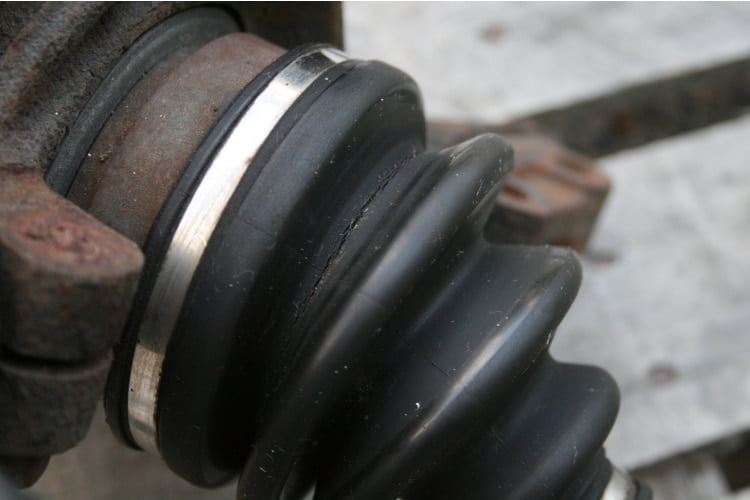
Why Replace A CV Boot?
Like every other part of the car, the CV boot deteriorates too. When this happens, the protective CV joint grease leaks out, allowing dirt, road grime, and water to enter the joint. This causes the CV joint to wear out quickly and fail prematurely.
The CV boot is an essential part of the vehicle that mostly lasts as long as the car does. However, it would be best if you replaced them before they collapsed.
When Should A CV Boot Be Replaced?
It would be best if you replaced your CV boots as soon as you or your mechanic observed any cracks, splits, leaks, or tears. Although it is possible to drive with a torn CV boot, that’s risky.
Source: wikimedia.org
Read more: Front Axle Of A Car: Types, Functions, And Replacement
Signs Of A Fail CV Boot
You must pay attention to the sound your CV boot gives to determine that it’s failing. There are three significant signs a CV boot gives before failing:
Grease Leaking
The most prevalent sign of a failed CV boot is a grease leak because most of the time, when the CV boot is dry, it becomes fragile, resulting in splits or tears.
Once this happens, oil leaks from the boot onto the tire’s inside or other parts of the vehicle’s underbelly as the axle moves.
Clicking in the middle of turns
Clicking noises from the axle, especially during turns, are dangerous signs of a torn CV boot. Once you hear this sound, it means that the joint has gotten loose enough to develop the play, causing it to click during turns.
Unfortunately, this kind of damage is usually not repairable, so the CV joint will need to be replaced.
Vibrations
Vibrations emanating from the axle area are another sign of a damaged CV boot. Dirt, debris, and moisture can enter the CV joint through a damaged boot, causing joint degeneration and vibration.
When a CV axle begins to vibrate, it almost usually requires replacement.
Read more: Broken Axle: Signs And Causes
CV Axle Boots Replacement
Replacing your CV boots before they break keeps you safe and allows you to save yourself from spending excessive money. If you or your mechanic notices a worn CV boot, you should replace it before any significant damage to your CV joint occurs.
In addition, every time you service your vehicle, the CV boots are inspected, making it easy to know when a CV boot leaks.
A CV boot leakage can cause the attached joint to become damaged, posing a severe safety hazard, which can harm your safety. So, instead of risking it, you should replace it.
Determine The Condition Of A CV Joint
Automobiles consist of several minor parts that don’t get much attention yet are critical to the vehicle’s safe operation; one such part is the CV joint.
The first thing to do before changing a CV boot is to determine the condition of the CV joint. If there is no noise and only the CV boot is damaged, replace it.
Also, you should note that the joint begins to wear significantly more quickly and eventually fails once grease is ejected from a CV joint due to a broken or torn CV boot. You can only repair a damaged CV joint by replacing the CV axle.
Once the CV joint breaks, repacking it with new grease and installing a new CV boot will not fix the problem.
So, to establish the condition of a CV joint before repacking it with fresh grease and installing a new CV boot, first determine the condition of the CV joint.
How to determine the condition of a CV joint:
Step 1: Examine the CV joint closely through the broken or torn CV boot with a powerful flashlight. Check if there is any grease or oil left in the joint. If there is none, replace the CV boot.
Step 2: Grasp the CV axle near the joint with both hands and try to move it back and forth, then in and out. In either direction, there should be minimal or no movement. If you notice any movement, then replace the CV axle.
Step 3: Take the vehicle to an open area where you can drive safely without hurting yourself or others.
First, turn the steering wheel completely in one direction and drive in a circle when it is safe. Now try it the other way around. Did you hear a clicking or popping noise when moving in a circle in either direction? If yes, that’s a sign that it needs replacement.
Types Of Replacement CV Boots
There are three types of CV boots replacement.
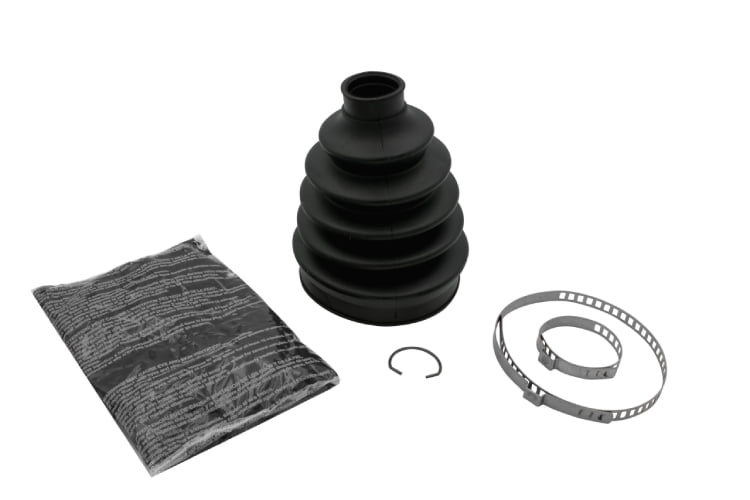
Conventional CV boot design
Source: empius.com
The conventional CV boot design is the best, most expensive, and time-consuming to install of the three CV boots.
This CV replacement design requires removing the CV axle from the car, then removing the CV joint from the axle before packing the joint with grease and fitting the CV boot.
Stretch boot design
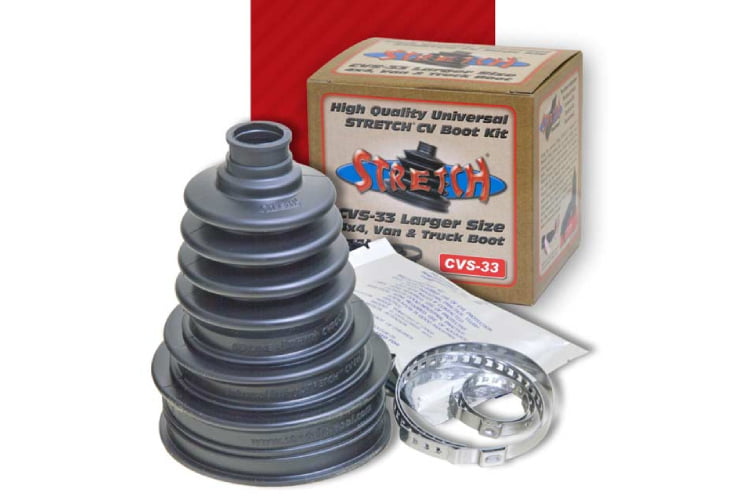
Source: stretchcvboot.com
This replacement design allows the CV boot to stretch over the CV joint and hold it together with a unique adhesive or huge clamps in this design.
Replacement with a stretch boot design is more complicated than with a split boot because the stretch boot is a one-piece boot that lasts longer.
It does not necessitate the removal of the CV axle; however, it does necessitate the removal of the wheel and hub assembly.
Split boot design

Source: bailcast.com
Unlike the other two, the split–boot design does not need the removal of the wheel, hub, or any other components. Instead, open the boot at the split and place it around the CV joint to create this CV boot replacement.
The boot is sealed snugly around the CV joint with a special adhesive or huge clamps. The “split-boot” is the tagged poorest of the three boot systems, although it is the easiest and least expensive to deploy anytime.
Read more: Torsion Axle Vs. Leaf Spring: Which One Is Better?
How To Replace A CV Boot
When CV joints are damaged, they will make noise when turning. The noise indicates that the entire CV boot needs replacement. Here are the steps to follow to replace your boots.
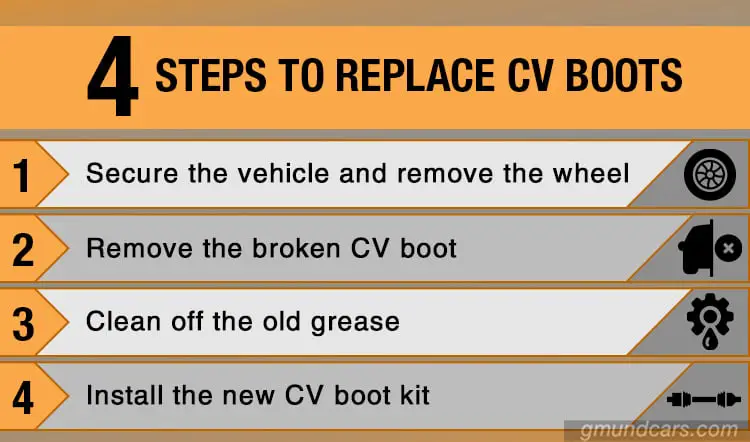
Step 1: Secure The Vehicle And Remove The Wheel
You must first apply the emergency brake before removing the wheel. Ensure your car remains static and doesn’t roll backward when being raised. Next, place the wheel chocks behind the back wheels. Then, raise the vehicle and locate the side of the car that needs a replacement CV boot.
Place the safety stands under the car in the body frame’s proper placements to support the vehicle’s weight. Then lift your vehicle as high as feasible to gain the clearance you’ll need to work beneath it.
Afterward, use the lug nut wrench to remove the wheel, then have someone inside the car pressure the brakes while loosening the lug nuts.
Step 2: Remove The Broken CV Boot
To remove broken CV boots, you need first remove the metal clamps using clamp cutters. On each end of the rubber boot, there is a clamp.
There will be grooves on the axle and CV joint area to designate where the boot and clamp hold down if you look closely.
After removing the metal clamps on both sides, use the box cutter or blade to cut off the old CV rubber boot. Start cutting at the edge closest to you and work your way to the opposite end. This method of cutting ensures that no injuries occur.
Step 3: Clean Off The Old Grease
Cleaning off the old grease from the joint is very important. To clean the joints, ensure you wear gloves and safety goggles. Then, to avoid staining your flooring, place a bucket under the CV joint you’ll be cleaning.
Make sure the axle and joints are clean. Remove the old grease and particles with the parts more hygienic agent. Then remove any remaining residue with rags or paper towels. Toss the used towels and rags into the pail.
Step 4: Install The New CV Boot Kit
Once you have removed the dirt, go ahead to grease the joints. Cut one tip-off at any end of the grease bag and apply it to the affected regions: re-grease the CV joints and a portion of the axle.
Replace the boot with the new one. CV boots come with pre-cut sealed grooves that need to opening and the boot installed over the axle. Then, apply the adhesive that came with the boot kit to both ends of the boot and stick them together once it’s over the axle area. When the adhesive dries, it becomes as flexible as rubber.
Grease inside the new CV boot and fill it up with as much grease as possible. Doing so will keep the joint locations safe in the future.
If you look closely, you’ll see grooves on both ends of the boot holding it in place. Then go ahead to place the replacement CV boot in its proper location. The smaller end of the CV boot is on the axle shaft, and the bigger opening is over the outer CV joints.
Put the clamps in place, then install the metal clamps after installing the CV boots.
After the replacement is done, set to reinstall your tires, remove the safety supports, and remember to disengage the emergency brake before
Conclusion
CV boot damage occurs in everyday driving scenarios, such as driving in hard-packed snow or on roads with large pebbles or stones, and the end outcome is the same regardless of how the harm happens.
So, to ensure safety, you should replace the boot before complete breaking occurs if it is not adequately lubricated.
Frequently Asked Questions
How much does it cost to replace a CV boot?
The cost of replacing CV boots depends on the make, model, and kind of vehicle. In most cases, replacing the CV boots can cost $150-$600, while certain large or luxury vehicles can cost $600-$1,200 or more.
How long will a broken CV boot last?
It’s impossible to say how long the poor joint will stay; it may be a year or a month.