Batteries have always been a crucial element in numerous vehicles. If a car’s engine doesn’t start or the headlights appear less bright than usual, it could be an issue with the car’s battery. In some cases, the alternator might be the problem.
Uncertainties like this make it ideal to know how to test a car battery to ascertain its condition without visiting a mechanic. Hence, this knowledge is quite valuable and can help save money and time.
This article discusses how to test car battery amps with a multimeter at home and other related things to know.

What Is Ampere?
First, it is fundamental to understand the term “AMPERE” before testing car battery amps with a multimeter. Ampere (commonly called amps) is a standard unit that expresses the strength of an electric current.
An Ampere of electric current is equivalent to a unit of electric charge moving past a point in a second. Although an ampere represents a Coulomb per second, the former is widely and practically used to express current flow.
Like other electrical components, batteries have electric currents, providing information about their condition. Therefore, testing for battery amps is beneficial.
Ideally, Amperes are measured using an ammeter. However, multimeters are versatile and efficient enough to test multiple electrical parameters, including Amperes.
How To Test Car Battery Amps With A Multimeter
To test car battery amps with a multimeter, purchase a working resistor (e.g., ten amps). A few calculations to determine the battery condition require a pen, paper, and calculator. Let’s get started.
Testing car battery amps isn’t complicated, provided the multimeter works fine. It is essential to know that multimeters do not have a specific car battery test feature. Hence, a good knowledge of this device is vital.
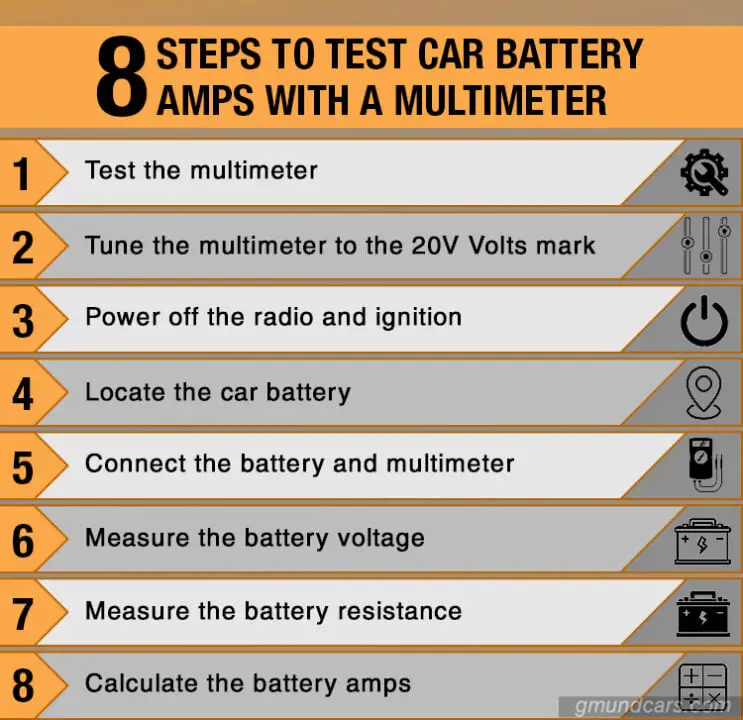
The following steps explain how to test car battery amps with a multimeter.
Step 1: Test the multimeter
Purchase a multimeter for this procedure if you don’t have any. There are two common multimeter types – digital (with a numeric display) and analog (with a moving pointer). Most multimeters come with the primary device and two probes.
Test the condition of the multimeter and test leads to avoid false results. Switch the multimeter to the ohms (Ω) setting and connect the probes. It should output approximately zero when connected and one when disconnected.
Another way to test a (digital) multimeter is to set it to the continuity mode and join the test leads. It should make a continuous beep sound.
Step 2: Tune the multimeter to the 20V Volts mark
Once the multimeter passes the test, it is time to check the car battery. Identify the settings range for the DC voltage. The typical markings include “DCV” or “V” (with solid and dotted lines below it).
Generally, car batteries have a peak voltage of 12.6V. Hence, switch the multimeter knob to a higher voltage setting, preferably the 20V mark. In this setting, the output range will lie between zero and 20V.
Step 3: Power off the radio and ignition
Before testing for the battery amps, you need to remove any electrical load. It implies that you have to power off the car radio, lights, and engine.
Step 4: Locate the car battery
Open the car’s hood and locate the battery. In most vehicles, the battery can be in either front corner. In some Mercedes models and a few others, the battery may be close to the back of the engine.
Step 5: Connect the battery and multimeter
Now to the real deal. Connect the probes correctly to the multimeter. Remember that the black test probe will always go into the ground/negative/black/COM port.
Take a close look at the battery to identify the negative and positive terminals. Most batteries have colored or marked terminals. The red or plus sign indicates positive, and the black or minus sign for negative.
Place the multimeter in a stable position near the battery. Connect the battery and the multimeter; the test leads should go to the respective terminals. Ensure that the positive test lead should touch the positive terminal and vice versa.
Step 6: Measure the battery voltage.
Provided the multimeter is good and connected correctly, it should display the voltage of the car battery. For analog multimeters, the pointer will move to the measured voltage. The result indicates the battery’s condition.
Below is a table explaining the battery condition based on the voltage output.
| Voltage (V) | Battery Condition | Battery Status |
|---|---|---|
| 12.6 | Excellent | Fully charged (100%) |
| 12.4 | Good | Charged (75%) |
| 12.2 | Charge required | Partially charged (50%) |
| 12 | Charge required | Low charge (25%) |
| 11.9 or less | Discharged | Discharged; Dead. |
Read more: When To Replace Your Car Battery
Read more: How Long Does it Take to Charge a Car Battery?
Step 7: Measure the battery resistance
It is impossible to measure the internal resistance without applying a load. Therefore, connect the car battery to a known electrical load, preferably a 10-amps resistor. Then put the multimeter (in the 20V setting) to the circuit.
The connection should appear in this format:
– The battery’s positive terminal to one end of the resistor,
– The other terminal of the resistor to the battery’s negative terminal,
– And the multimeter’s test leads are connected to either side of the resistor.
Write down the voltage displayed. Ideally, it should drop by a few decimal places compared to the previous step. The internal resistance of the car battery causes a voltage drop.
Voltage (Volts or V) describes the electric potential difference between two points on a conductor. In simple terms, it is the pressure that pushes electric charges around a circuit. On the other hand, resistance deals with the opposition to the current’s flow in an electric circuit.
With this knowledge of Ampere, voltage, and resistance, calculate the battery internal resistance using the Ohm’s law formula:
Voltage (V) = Ampere (I) x Resistance (R)
Assume that the voltage dropped from 12.6V to 12.4V, and there is a 10-amps resistor employed for the test. Subtract the initial voltage (without the resistor load) from the new voltage to derive the voltage difference (Vd).
Vd = 12.6V – 12.4V = 0.2V
Resistor rating = 10 amps
The battery’s internal resistance = Voltage Difference (Vd) / Resistor’s rating (I)
= 0.2V / 10 amps = 0.02 Ohms
Step 8: Calculate the battery amps
Most multimeters can only measure the voltage. Nevertheless, it is possible to get the amps of a car battery with some math. Recall that Ampere (amps or I) implies electric current.
The electric resistance of the battery is 0.02 Ohms, and its voltage is 12.6V (based on the initial assumption). By rearranging Ohm’s formula, calculate the battery amps.
Ampere (I) = Voltage (V) / Resistance (R)
Hence, the battery is 630 amps (12.6V / 0.02 Ohms).
Read more: Voltmeter vs. Multimeter: Which One Should You Choose?
Caution When Testing Car Battery Amps With A Multimeter
When handling the multimeter, take adequate caution to avoid damaging it. A faulty multimeter will give out inaccurate measurements. It will either display more than the actual output or below it.
Here are a few precautions to note when using a multimeter.
- Never attempt to overload the multimeter. When uncertain about what settings range to use, starting with a more considerable range is safe for the multimeter.
- Ensure that the multimeter is in the proper settings before connecting to a battery (or circuit).
- There must be a proper connection between each probe and the multimeter.
- When using the multimeter, ensure no contact between the probes or leads while connecting to the battery (or circuit).
- When switching from one setting to another, never leave the test leads connected to the battery (or circuit).
Read more: Best Multimeters For Automotive 2022
FAQs
1. How many amps does a 12v car battery have?
While car batteries have a more specific voltage of 12V or thereabouts, there is no actual output (Amperes). Depending on the size or type, car batteries may have values anywhere from 500 amps.
2. Is 300 amps enough to start a car?
No. 300 amps is barely enough, except for some small cars. Most vehicles will be fine with 400 to 650 amps to get them running. Some large vehicles may require anything above 1000 amps.
3. How do you check a car battery without a multimeter?
Although not very accurate, it is still possible to check a car battery without a multimeter. Put on your car’s headlights without igniting the engine. If the light appears dim, the battery may be weak.
However, there is a twist as the problem may not be coming from the alternator. To confirm the battery condition, switch on the car and headlight, and rev the engine. If the headlight brightens while revving the engine, the battery is weak, and the alternator is okay.
4. What does Ah mean on a 12-volt battery?
When explaining battery capacity, Voltage and Amperes cannot do enough justice. Therefore, battery capacity is expressed in Ampere per hour (Ah). It is the number of Amperes a battery can provide in one hour.
For instance, a battery rated 200Ah can provide 200 Amperes in an hour. If connected to a device that requires 50 Amperes, the battery will be down after four hours (200Ah divided by 50A equals four hours).
Conclusion
Many vehicle owners engage in a poor maintenance practice, ignoring inspection until a problem arises. However, testing a car battery routinely can help prevent awkward scenarios, making it easy to identify defects faster.
This practice allows prompt detection of a deteriorating alternator, not just to discover battery weakness. By following this straightforward guide, you should know how to test car battery amps safely and correctly from now on.