It’s vital to understand where to hook up the remote wire for your amp, regardless of whether it’s a factory or aftermarket model. The remote turn-on wire must be connected, otherwise, you’d face the issue of the radio turning on, but without sound in the case of a factory amplifier. Conversely, an aftermarket amplifier won’t power up at all unless the remote wire is connected.
This article shows you some places to connect the remote wire on an amp to save you from amp installation issues. I’ll tell you why you should connect the turn-on wire correctly because it’s something you can’t skip. Otherwise, your amplifier won’t know when to turn on or off.

What Does The Remote Turn-On Wire Do?
The remote turn-on wire is located behind the car’s stereo. On aftermarket amplifiers, it’s usually the blue with white wire. The remote wire tells the amplifiers when to turn on the stereo (usually, when you start the car).
Typically, the remote wire will receive a positive 12V DC signal from the car’s electrical system when the ignition key is in the ON position. This signal transfers through the remote turn-on wire to the amplifier’s turn-on circuit. The amplifier senses the 12V DC voltage and turns the stereo on.
Similarly, when you have the ignition key in the OFF position, there’s no voltage in the wire, and the amplifier shuts off. However, some modern amps do not require a remote turn-on wire because they use auto turn-on technology. In this case, auto turn-on senses the incoming signal via the head unit’s RCA or speaker level inputs.
Nonetheless, if your amp does not have auto turn-on, you’ll have to install the remote turn-on wire.
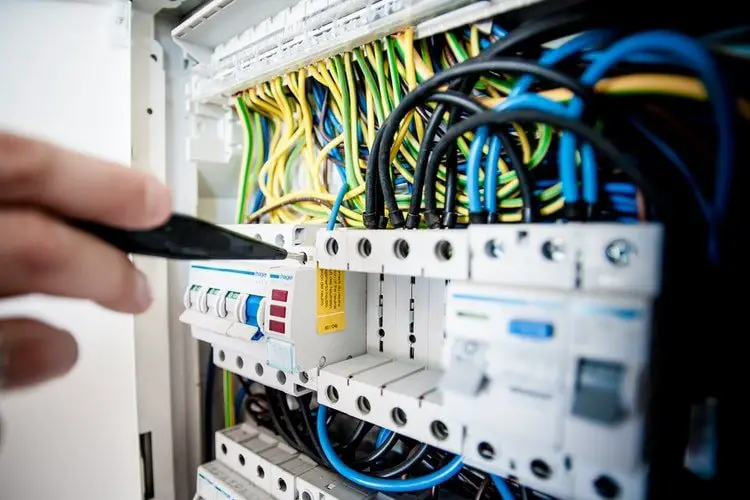
Connect The Amp Remote Wire For An Aftermarket Head Unit
Where To Connect The Remote Turn-On Wire For An Amp
The remote wire on aftermarket amplifiers is usually blue and white. A quick look at the user’s manual will reveal this wire.
Here’s what you should expect.

Notice that there’s also a solid blue wire. This is the factory turn on wire or power antenna, and you should not confuse it with the remote turn-on wire
How To Connect The Remote Turn-On Wire For An Amp
The wiring harness on an aftermarket amp has a blue and white wire marked clearly. All you need is to connect the blue wire in the harness to another line of primary blue wire. Then, run the primary wire back to the amplifier such that it terminates in the remote wire terminal.
How to Splice into Existing Wiring
Several methods are available for splicing or connecting to existing wiring for aftermarket installations. Nonetheless, the best way is to solder each splice and then protect the stripped wired connection with heat shrink and electrical tape.
This method is the most expensive and takes the longest to complete. Nevertheless, it produces a long-lasting connection.
Other methods for splicing into existing wiring are Scotch Locks and butt connectors.
A butt connector is a metal tube encased in plastic insulation. Here, you’ll cut the wire at the location where you want to install the butt connector. Next, compress/crimp one end of the wire you’ve cut into one end of the butt connector. Then, twist the new wire and the cut wire together. Finally, install the twisted connection of the two wires into the other open end of the butt connector and compress this end as well.
It’s advisable to protect the butt connector with heat shrink tubing or electrical tape.
As for a scotch lock connection, you will not need to cut the wire you want to splice into. Plus, you can make the spice with only a single crimp. A scotch lock uses displacement contacts or a guillotine to strip the wires off their insulation.
Before locking the scotch lock connector, place the primary wire through the wide channel, furthest from the opening. Then, place the new wire into the narrow channel closest to the opening. Now, close the top latch. This will force the guillotine through the wires and onto the bottom of the scotch locks.
Sometimes, the guillotine may not strip the wires meaning there will be no connection. As such, you have to test the splice wire to be sure that there’s a solid connection.
Connect The Amp Remote Wire For A Stock Head Unit
Unlike aftermarket head units, your factory or stock amplifier does not have a remote turn-on output. To this end, you can connect the remote wire to the car’s fuse block, the ACC wire, any 12V switched source, a turn-on module, or the power antenna wire.
I’ll show you how to connect the amp remote wire for a stock head unit in each of these locations.
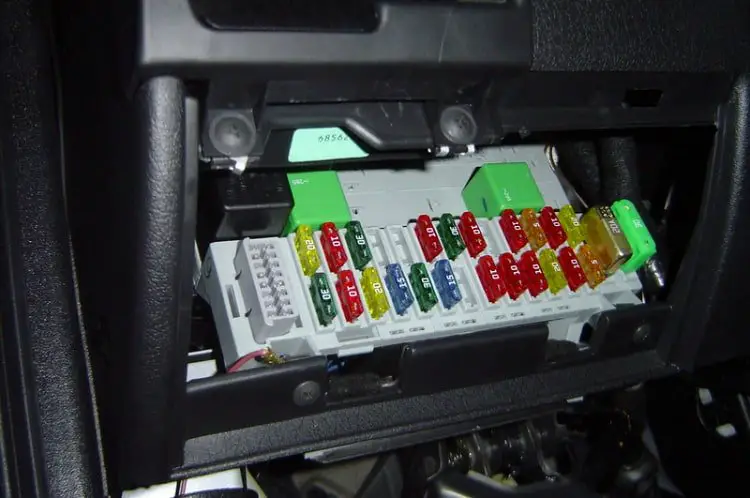
Connect Remote Wire For An Amp To Fuse Box
This method is perhaps the simplest and fastest to get your stereo to work. The fuse box is also one of the best locations since it controls the power upon turning on the ignition. As such, when you put the key in the ignition, the amplifier will turn on, and it will turn off when you take out the key from the ignition.
How to Connect: Step-By-Step
Step 1: Key Off the Ignition
The first thing is to make sure the car is not running by turning off the ignition.
Step 2: Locate the Fuse Box
You need a fused slot in your fuse box. Hence, know the location of the fuse box. If you can’t find it, check your owner’s manual. Next, take a look at the fuse diagram to figure out the best place to begin.
Note that as long as the remote wire receives power when you turn on the ignition, you can connect it to any fused output signal. However, you have to use a voltmeter to probe to be sure.
Step 3: Turn Your Voltmeter to DC
This is the solid line with dots blowing it. Locate a good ground and connect the black test lead. Then, place the sharp edge of the red test lead into one hole first and then in the other.
The voltmeter should read 12 volts when the ignition is on and nothing when the ignition is off to indicate the fuse turns on and off with the car. Thus, you can hook the remote wire to that fuse.
Use Power Antenna Wire
You can switch the power antenna for the remote turn-on wire on your head unit. However, when you turn on the head unit, you have to ensure that the power antenna is active in all modes, including Aux, radio, SD card, CD, etc.
The majority of cars come with permanent antennas. Those that don’t have fixed antennas power up when the ignition and head unit are on. In other words, when you turn on the radio, the power antenna will only output 12 volts in some vehicles.
Hook It Up To The ACC Wire
The accessory wire is used for your car’s add-ons like the radio and wipers. It only powers when the key is in the run or accessory position. Usually, it cuts off when your car’s engine is cranking. Hence, it’s the wire you want to connect to the remote turn-on wire.
How to Connect
Connecting the remote wire to the accessory wire is similar to hooking it into the fuse box.
There are a few options for tapping into an electrical line, but the simplest does not involve cutting or stripping the wire. You require a quick tap connector where you put the new wire and the wire you want to tap into and then clamp it down with pliers.
The connector will self-strip the wires’ insulation so you can connect to the circuit. However, you may require to connect a toggle switch along the inline of the new remote wire to turn off the amplifier when your vehicle is on.
Most people would like to leave the amplifier turned on as long as the head unit is on. Nevertheless, if you want to turn off the amplifier, you can flip the toggle switch to stop the flow of 12 volts of power to the amplifier’s remote turn-on wire terminal.
Another excellent way of using the ACC wire to turn the amplifier on and off remotely is to use a relay. The accessory lead connected to your radio will turn it on and off with the car’s ignition. As such, the amplifier will follow a similar connection where it will turn on and off when you turn the ignition key.
Some people may feel that a relay is overkill when you have only one amplifier. However, it’s beneficial if you have two or more amplifiers connected to one source.
Wire Remote Turn-On To A Switch
Other than using an ACC wire and remote wire connection to power the amp remotely, you can also use a switched 12V power source. In this case, you need to connect constant power and ground to a switch and then wire the remote turn-on to the output of the switch.
This connection enables you to turn the amplifier on and off manually with the flip of a switch. However, if you forget to turn off the amplifier when the car is not running, the amp will continue to draw energy from the battery, resulting in a dead battery.
For example, if your amplifier is installed in the trunk, you can connect its remote wire to the fuel pump wire and you’ll have your switched 12V power source.
Use A Turn-On Module
A turn-on module is typically a tiny gadget that provides a turn-on signal to the amplifier. Most turn-on modules can produce a remote turn-on signal from any voltage source rated at more than +0.8V. It means you can trigger the remote turn-on by tapping into the speaker wire or a low-level trigger lead.
When the turn-on module picks up the voltage on the speaker, it will send a 12-volt signal to the amplifier’s remote wire and then to the turn-on circuit.
Read more: How to install a car amplifier [with infographics]
Multiple Amps Remote Turn-On Wiring
You can run two amps off of one turn-on wire. Nonetheless, multiple amps will not turn on if you’re using only one remote wire since the remote turn-on wire cannot handle the current draw of multiple amps.
The best way to work around this setup is by using a relay that’s triggered by the head unit. Still, the relay should not receive power from the head unit but from another 12V source such as the battery or fuse box.
This arrangement allows the relay to supply enough current while isolating the turn-on signal from the head unit so that it does not stress the remote output of the radio.
Read more: Bad Ground On Amp Symptoms
Test Your Remote Turn-On Wire
A multimeter is an ideal tool for testing the remote turn-on wire since it uses the same process as testing the power cable or ground wire.
The first thing is to turn off the ignition. Then, place the multimeter’s positive probe (red) on the end of the remote wire and make sure it is touching the wire strands inside the remote wire’s jacket. Next, place the multimeter’s negative probe (black) to a grounding point.
There should be no voltage reading when the ignition is off. Now, turn on the ignition, and you’ll see a voltage reading of 12+ volts at the remote turn-on wire.
If there’s a reading of more than 12 volts when the ignition is off, it means that the remote wire is connected to constant power. On the other hand, if you don’t have a voltage reading when you turn on the ignition, the remote wire is connected poorly, or it’s connected to a wire that does not receive power when your car is on.
Read more: How can I choose the best car amplifier? [top 5 products review]
Conclusion
By now, you know where to connect the remote wire for an amplifier. Understanding the best locations and the correct way of installing the remote wire will save you from potential amplifier problems. To this end, it’s essential to learn the best and safest way to splice into existing wires for a secure connection.
Good luck!